Friday 15 September 2017

Talavera Redux

We recently played the battle of Talavera in 15mm using Commit the Garde rules. The details are in a previous post. We agreed that the scenario was interesting enough to try again so I reset the terrain and switched sides to give it another go.

In the first run through of the battle, the French tried to ignore the British and attack the Spanish. In this battle the French plan was to pine the British in the center and break through the difficult terrain on the exposed flank to force the British to defend 2 fronts with inferior numbers. 
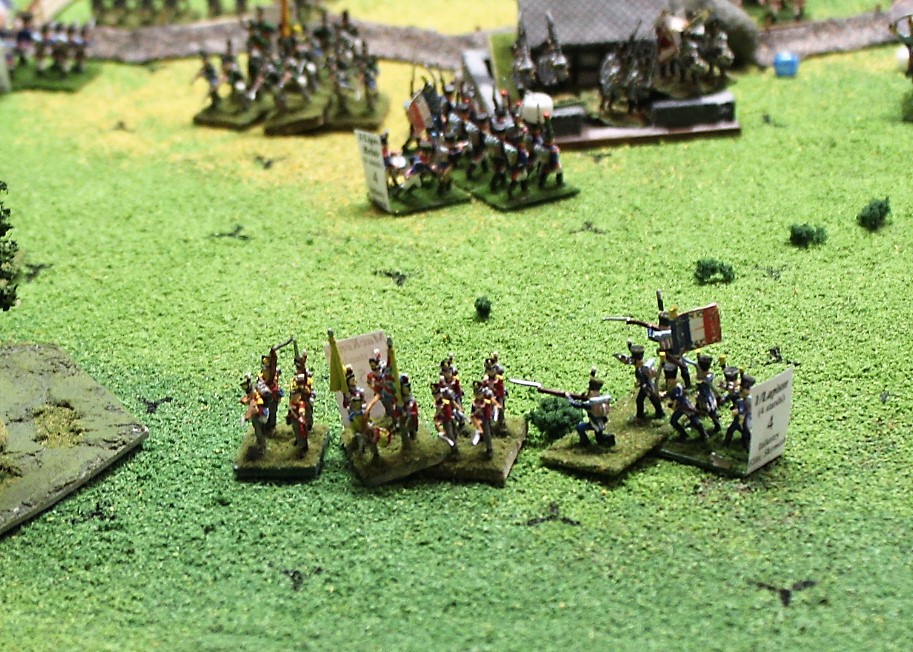
French foot face of against British guard cavalry


The French pressed ahead on the flank with 5 infantry and 2 cavalry with Marshall Victor making sure it all went to plan. A large firefight occurred across the stream with both sides taking casualties. The French flanking attack bogged down in the difficult terrain but drew off valuable reinforcements from the Allies. 

The Spanish defending Talavera remained in their field works except for 2 cavalry units who came out to threaten the French left. Slowly but surely the French plan was coming together. The British were having to withdraw badly damaged units and became the thin red line. The French made a breakthrough on the right but were hampered by the terrain and the loss of three generals over the course of the battle.
Wellington's HQ
 British units retreat to the hill for a last stand


Just as the the lines were starting to break up into a free for all, the Spanish cavalry on the French left was joined by the lone Spanish general, broke through the French defenses and proceeded to roll up 4 infantry units, clearing a large swath of the French line. The remnants of the cavalry unit survived to tell the tale and were hailed as the heroes of the battle. French morale collapsed on the following turn.


Remnants of the heroic Spanish heavy cavalry


The battle was a real nail biter. Both armies were extremely worn down at the end but the French could not recover from this cavalry charge on top of other losses. 

For future games, we will add a rule that allows cavalry in good order to evade attacking infantry if they pass a morale check.

Thanks for an awesome game John!

Saturday 9 September 2017

The Long March to Battle

I finally got to play my Talavera game tonight. I had scheduled a game with some able players but this ended up falling through due to work commitments. I then failed to summon the motivation to play it solo before I left on a lengthy vacation. The battle was left on the table while I was gone.


I was able to reschedule for today and the battle was played to a conclusion this afternoon with fellow Armchair Commanders Jonathan and Martin. Jonathan commanded the French and Martin commanded the British, leaving me with the fragile but well defended Spanish.

We scenario allowed a free set up but we opted to try and replicate the historical deployment as best we could. The French marched the bulk of its army toward the Spanish army, cowering behind their defenses. They left one division to screen the British and sent another division across the river threaten the British flank.
French advance in the foreground and mass troops in the background left

The Spanish sent a rider galloping for Wellesley begging for reinforcements as the French were forming up to push against their fortified lines. The British obliged by sending their light infantry brigade from the reserves to fill an obvious gap in the Spanish defense. The Spanish also sent in an infantry brigade from the reserve to fill another gap as well. 

French view of the Spanish defenses


The French continued their redeployment toward the Spanish. In their haste, they failed to adequately screen the columns. Wellesley saw his chance and sent the British over the river to put in a spoiling attack. This was a little risky as the British abandoned their defensive terrain to do this and could be overwhelmed by French superior numbers. They had good success with the attack and forced the French to deploy 2 divisions against them that ere otherwise heading to battle the Spanish. The French could not capitalize on the British exposed position due to some poor activation rolls and worse reinforcement rolls. 

British spoiling attack goes in, surprising the French in column

The French division trying to flank the British line had some initial success in drawing off units, but was eventually repulsed with  heavy casualties. 

Battle overview


The French probed the Spanish lines but never seriously threatened it. They did not have the reserves they had hoped for to sustain an attack against the entrenched Spanish. a British brigade managed to break through and destroy the French HQ. The remaining British withdrew behind the river due to increased threat from French cavalry deployed from reserve.

View from the French lines as the British withdrew back across the stream


The French morale broke after the loss of their HQ. We agreed that the French numbers had been reduced enough that a successfully  breakthrough could not be achieved.

Victorious British brigade after knocking out Jordan's HQ


Good chance we will try the scenario again switching sides so stay tuned for the rematch results.

ACW and New Terrain


Ouch. It has been a long time since my last post. In my defense, I have been away on vacation for the last 2 weeks. Prior to my departure, I was able to finish a project and test it out with my 15mm ACW figs using Battle Cry rules. I built a frame for Command and Colors games to define the border of the games. This is the gray structure seen below, laid on top of my larger hex mat. I built this by cutting up the 3mm MDF board that was used as a template for the hexes on the mat. I finished it with chalk textured spray paint which I had not tried before. Very pleased with the results.

 I played a solo game of Battle Cry with the Antietam scenario. This was scenario puts  larger Union force against a smaller Rebel force in better terrain. The Rebels won handily 6-2.