Showing posts with label ACW. Show all posts

Saturday, 9 September 2017

ACW and New Terrain


Ouch. It has been a long time since my last post. In my defense, I have been away on vacation for the last 2 weeks. Prior to my departure, I was able to finish a project and test it out with my 15mm ACW figs using Battle Cry rules. I built a frame for Command and Colors games to define the border of the games. This is the gray structure seen below, laid on top of my larger hex mat. I built this by cutting up the 3mm MDF board that was used as a template for the hexes on the mat. I finished it with chalk textured spray paint which I had not tried before. Very pleased with the results.

 I played a solo game of Battle Cry with the Antietam scenario. This was scenario puts  larger Union force against a smaller Rebel force in better terrain. The Rebels won handily 6-2.


Sunday, 25 June 2017

Muskets and Bayonets

It has been a while since my last post but I have been thinking about what to write on a regular basis. There is nothing like a big game to send me to the keyboard. Yesterday, we had 6 players for a 1st Bull Run scenario,American Civil War. The first major engagement of this conflict. We used the hex based Battle Cry rules and my 15mm ACW. The venue was the Kentville Recreation Centre run by the Kentville board game club. They meet quarterly and we have been putting miniature games on for the past 5 meetings or so. It is a good way to recruit and meet new players.

I chose this game because it was easy to put on The group was hoping for a big Napoleonic affair but I did not have time to put that together. The Confederates lost the race to the central ridge but were able to put in a punishing counter attack for the win. Stuart's cavalry were able to outmaneuver their Federal opposites. I have the first edition of these rules and we played the rules as written. It worked well but I think there have been some subtle changes in later editions that improve the random flavor of the game. For example, the All Out Attack card lets one order every unit on the board. There is only one of these in the deck and if  your side gets it, you will likely win. I think this is removed or toned down in later editions.

Thanks to all the players for a fun game!


Tick of a 6x6 game, Next, Chain of Command WWII solo game and July 9th Commit the Garde Nappy's.

Rebs on the left of the deployment and my attempt to edit a period like pic

Union left

Same deployment but without my attempt at period photography

This table looks way better but requires lots of time and does not travel well

Monday, 27 March 2017

Fire at Will

After a marathon Napoleonics game, it is time for a fun and quick ACW game. As a bonus I get to tick a box on my 6x6 project.


I set up the battle of Shiloh from the scenario book in Battle Cry. I used my 15mm ACW figures with each base equaling a figure. This scenario had lots of trees so the battle field looked full. I played against the dynamic duo of Elijah and Riley. There was much dice rolling and laughing  as my figures were killed. All in all a fun game and a narrow victory for the Rebels.


Battle Hardened opponents

 Federals troops looking for cover in the woods

Wednesday, 16 November 2016

Stones River 1862

I am ready to give my ACW rules another trial run. My favorite part about gaming this period is the opportunity to put together a really nice looking table with lots of interesting terrain. Many of the scenarios I have for Regimental Fire and Fury require a 5' wide table but my game table was only 4'x8'. Necessity and obsession are the mothers of invention. I bought a 1' wide board and bolted it onto the side of my existing table, held in place with 2x2s. Then I discovered the table was a bit wobbly so I remounted the legs so they were centred to the new table width. Now I have a 5x8 table and more options for scenarios especially for Fire and Fury and Napoleons Battles which usually call for 9x5 tables.

I selected a scenario from the main RF&F rulebook called " The Battle Comes to Sheridan: Stones River". I cut the hills out of my 1" thick foam and placed them under the game mat. I had enough fences and trees but needed to cut up some teddy bear fur and floormats to make the various crops. I bought a little hand vacuum which allowed me to use my home made flock liberally, as I knew it would be easy to clean. Here are some pictures of the battlefield without troops.


The troops have been sorted, labeled and marched onto the table. I added some flock to one of the fields and painted up a second ammunition wagon.


Tuesday, 7 June 2016

Turns 4 and 5 Regimental Fire and Fury

Holidays are great even when you are under the weather. I was able to fit in another 2 turns of the Fire and Fury game today. Turn 4 saw the casualty count rise for both sides as the Confederates set themselves up to attack the Federal main defenses around the redoubt. Timely reinforcements on the Federal right suprised the Confederate flanking regiment and it withdrew with heavy casualties. General Palmer commanding the Federal left was shot from his saddle.


Turn 5 saw the Confederate left assault the rifle pits with "cold steel". The 24th and the 49th Virginia regiments forced the Wessell's regiments to fall back from their covered positions with the help of Confederate artillery fire. Attacks in the centre and right were turned back.


Confederates charge the redoubt but are pushed back with canister and musketry.


During the Federal turn, things went badly for the blue coats. The counter attack to retake the rifle pits failed and they had lost the battles key position causing their morale to falter. Naglee's battered regiments routed off the board. Two regiments from Palmer's brigade now leaderless decided to fall back from the rifle pit line and abandoned their position. General Casey had to stabilize the remainder of Palmer's brigade.


Federal losses = 31 stands (heavy casualties at 38 stands)
Confederate losses = 38 stands(heavy casualties at 52 stands)

Turn 6

The Rebels left flanking maneuver with Rains' brigade finally arrived enfilading and driving off the Union defenders in the rifle pit. A reinforcing brigade failed to take action to counter this threat. Palmer's replacement arrived and tried to encourage his out maneuvered brigade to hold it's position which it did. The Rebels n the right held onto the newly captured rifle pits, opting to line up and shoot rather than risk any more charges. Rebel charge in the centre was pushed back. Federals fell back and tried to form a new firing line but were hindered by disordered and routing brigades. The Union artillery was screened by falling back troops.

Turn 7

Rebel troops pressed their advantage routing two Union Regiments on the left flank with a charge. The Rebels had 3 units fall back or rout due to casualties and bad rolls but overall were able to maintin the advantage. When the Union turn came they failed their morale due to having taken heavy casualties, losing their defended position and being outflanked which ended the game.

This rule set worked very well. Without knowing the rules, the players were able to come up with a battle plan and attempt to execute it. I learned that charging is difficult as it is easy to be driven back by defensive fire. A significant advantage is needed to gain a telling result in a charge. Even then, with 10 sided dice, nothing can be taken for granted. The Rebels were forced to attack to achieve the victory objective of capturing the rifle pits. They had the greater numbers and better quality troops to pull this off. The only thing the Union might have done better was to withdraw the brigade that was posted ahead of the rifle pits sooner to form a reserve. This would have allowed the Confederated to close more quickly but the difficult ground would have slowed them down.

After 1 turn with other players and 7 turns over all, I started to have the many die roll modifiers memorized and had to refer to the QRF less frequently. I need more disorder and out of ammo markers. The game looked great and I was happy to get to try out 2 never before used armies and much never before used terrain. Now to clean up!

Monday, 6 June 2016

Turn 2 and 3 Regimental Fire and Fury

Today I continued the battle from the last post solo. I am becoming more familiar with the charts but the turns still took about 2 hours each to play.

Turn 2


The Confederates received 4 more regiments and 5 cannon as reinforcements. They had a significant numerical advantage at this point but the onus of attack was on them. The 6th Alabama formed line and charged the 92nd New York but was repulsed by musketry. The 12th Mississippi assaulted the 100th New York and carried the position. Union cannons took a toll on the advancing Rebels.


The Union turn saw the 92nd New York rout behind the redoubt when it realized it's position was indefensible. The 100th NY withdrew in good order to form up next to a gun battery that had fallen back last turn. The remainder of the Federal move was dressing lines and rallying shaken regiments.


Confederate losses = 13 stands    Federal losses= 11 stands

Turn 3 


The Confederate front line units were starting to wear down and some were able to fall back in good order to be replaced by fresher regiments. They were able to get out of the difficult terrain and form a firing line to continue the firefight with the Union troops and exploit their greater numbers and quality. They were able to deploy face guns within canister range of the Union centre to lend weight to their fire.


The Union regiments were also wearing down but were less able to fall back without conceding valuable ground and were forced to stand in to delay the Rebel pressure.

They spent the turn rallying shaken units and using the reinforcements to support their flanks.


Counter battery fire was effective this turn with the Union damaging one gun and the Confederated damaging 2 in return.

Confederate losses= 21 stands    Union lose= 15 stands

CSA band entertains the troops


Hoping to add more turns tomorrow. I want to wrap this game up and get a WWII game going next.

Shots Fired - Turn 1

I had the pleasure of hosting Brent and Zak to try out a Regimental Fire and Fury game with my as yet unblooded ACW 15mm armies. We played for the evening and had a lot of fun coming up with a battle plan and then trying to execute it. None of us had played the rules before so we spent a lot of time flipping through the rule book and tallying up modifiers on the QRF. By the end of the evening we had only completed 1 turn! 

Deployment


End of Turn 1
Rebels on the left Yanks on the right


This pictures shows the Rebels have carried the position along the fence line and driven the Federals back toward the rifle pits in the rear. Brent was going to try or a flanking maneuver but was so happy with his success that he changed to a frontal assault.


Zak commanded the Confederate right. He elected to engage in a firefight and to by pass the Federal holding force.


During the post game discussion, we agreed that the rules played well and that we had successfully learned the rules. One turn was enough to learn command, maneuver, fire, and combat. There was some discussion of continuing the battle the next night but in the ned we agreed I would continue to play solo and players could jump in when available. 

In turn one the Rebels were able to advance and drive of half of the advanced division. Two Rebel regiments charged on the left while the division on the right engaged in a fire fight. 

Cannons and muskets blazed away and both sides suffered much disorder (casualty figures indicate disorder).


The rules were enjoyable overall. I think that with more experience their will be less need to go through the QRS modifiers every time we moved, shot or charged. This ended up eating up a lot of time. 

Thursday, 2 June 2016

"You have no idea what a horrible sight a field of battle is."

This quote is from Robert E Lee. I like ti think my version of the battlefield is quite attractive before the shooting starts at least. I am preparing for my inaugural battle with my newly minted American Civil War troops and a new (to me) set of rules. Here is a shot off the table before troop are deployed.


This is a scenario called Seven Pines from the Regimental Fire and Fury rule book. My table is a little more narrow than what the book calls for so the Yankees have less room to fall back past their camp. I chose this scenario because there are no hills. Almost all the other scenarios are festooned with lovely rolling hills and look great, but I have not figured out how to represent this level of detail without investing heavily in styrofoam boards, I thought about getting together a sand table but this remains an idea for later consideration.

This battle occurred in May 1862. The Federal army has been idling outside of Richmond and the Confederate army put together a counter attack to drive them off from threatening their capitol.

I have played Basic Old Fire and Fury (BOFF) a few times in the past and found it to work well with this period. Regimental Fire and Fury (RFF) scales the game down and adds different weaponry. I will post a review once I get the game completed. For now the units are in parade formation, labeled and ready to be deployed...
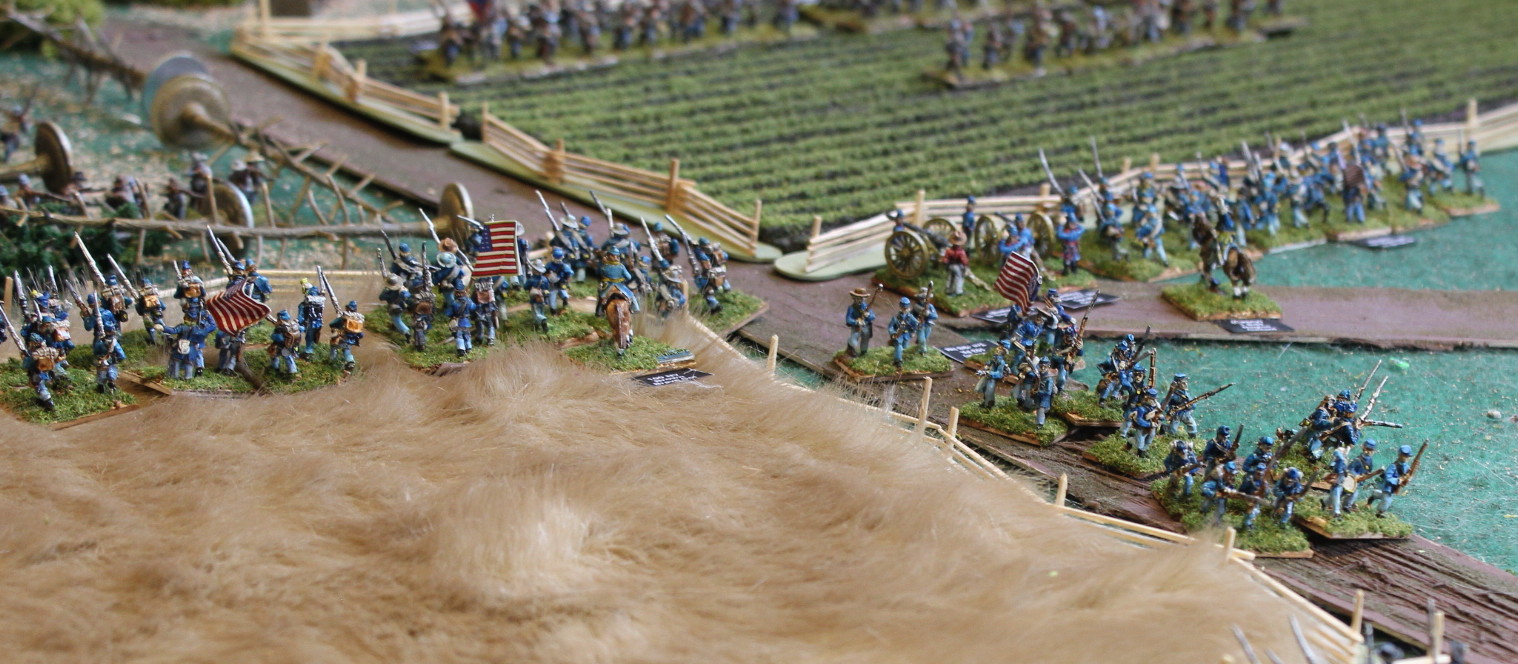


The Confederate Army marching to the sound of the guns.

Troops are now deployed. All pictures taken from behind  the Union lines


 Confederates advance across a frshly plowed field made of Dollarstore carpet and flock added.


 More Confederates advancing across an abatis made of felled trees.
 THe Union troops are deployed in depth. The front line holds while a routed regiment streams down the road past them.
 General Casey's redoubt

Another Union battery and limbers

Now to review the rules before rolling the dice.