Saturday 26 November 2016

"Always make your opponent think you know more than you really know"

This quote is attributed to General Phil Sheridan but it reminds me how difficult this is to replicate on the wargames table. I have kept the historical context in mind while planning the attack and defense in a solo game of the Battle of Stones River using Regimental Fire and Fury. The scenario had the Confederated approach a prepared Union position. The Confederate commander decided to attack from the South and Demonstrate/ Support the main attack from the West like this.


By the end of turn 3, the Confederate advance had gone well. There were 8 cannon attacking the hinge of the Union position and had forced their troops to abandon one of their key positions. The Union troops facing the main attack were forced to retire deeper into the woods. They quickly reformed and were reinforce by a second brigade from the Union reserve. The Rebels would face a strong counter attack if they made a move to occupy the abandoned Union position.


Rebel batteries advance

Turn 2 Rebels pour across the cornfield

Turn 3 Union key positions in Blue

 Union troops advance to engage the open Northern flank

Rebels prepare to take the Union key position

Turn 4 - The Rebels struggle to consolidate their gains on the southern flank while the Union troops fall back into the tree line to avoid the murderous Rebel cannonade. Maney's Rebel division advances into the cornfield following the Union retreat. Robert's Union Division advances slowly through the difficult terrain in the north threatening the Rebel flank there.

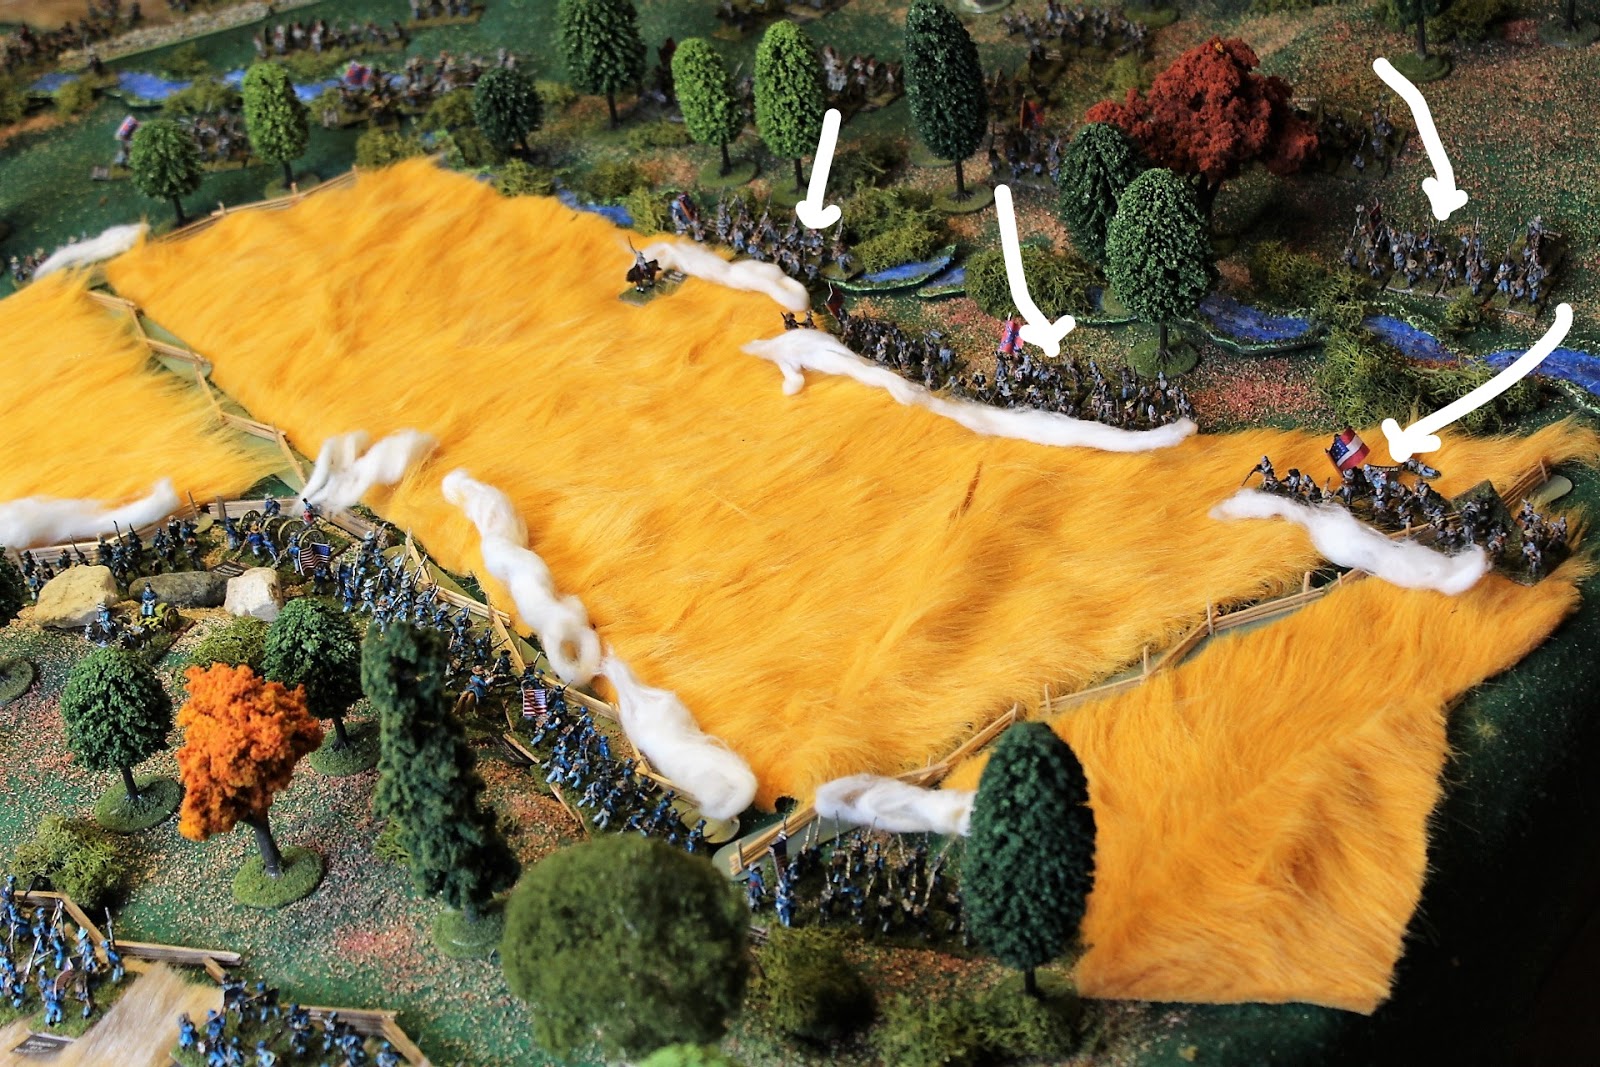
Turn 4 overview from the south

Rebels in the Cornfield 


Mahey's Rebel Div breaks cover in the west

Robert's Union Div threatens from the north

Turn 5 - The fighting in the southern woods intensifies with close range musket volleys and a bayonet charge. The Union forces are clinging onto the key position with one unit and a battery. They are hoping their attack from the north will arrive in time to force the Rebels to withdraw some troops from the main attack to deal with them. Union Brig General Schaefer is shot from his saddle. This will sorely hamper Union command control at a vital time next turn.

Union batteries in the rear


Union reinforcements poor into the woods


Union troops press the attack in the north


Turn 5 overview

Rebels bayonet charge routs a green Union regiment and a limbered gun


Battle lines

The Rebel commander realized that he could not shoot the Union troops from their position and prepared to assault them in hand to hand all along the line. He was motivated to press on as the Union flanking maneuvers in the north began to bear fruit. Over the course of the next two turns the Union slowly gave up ground and was eventually driven from their key position. The cost was high as both sides had reached heavy casualty status. Battle honors goes to the 21st Missouri and their brave Colonel for being green troops and repeatedly pushing back veteran assaults before having to retreat with Rebels on both flanks.

Battle lines meet in the Woods


Union troops occupy the Rebel defenses in the north


Victorious Rebels unopposed in the centre

 End game

Whew! This ruleset is not holding up as a solo game. Too many troops to manage by myself. Turns took about 2 hours each and it began to feel like a marathon. It would be way faster with 4 players a side and I will have to try to make that happen at some point. I will continue to look for rules for the period that are faster play. Perhaps Black Powder as they just released the expansion for the Civil War. In the meantime, there is always Battle Cry to scratch the ACW itch.

Sunday 20 November 2016

The Look is the Thing

I have been adding to my terrain collection of late. I am always looking to find the Nirvana of the perfect looking game table. Part of this process is creating unit status markers to eliminate the need for unsightly beads and such. For my upcoming ACW game, I have dead soldiers used to represent disorder and soldiers loading guns to represent out of ammo. I found that I was running out last game and resorting to beads. I dug around my bits box and found some items to use to build more of these markers. I found some muskets which I stacked to act as a low on ammo marker.


I found some horse casualties and added an artillery wheel to represent a damaged gun.


I found some crates to use as low on ammo markers for artillery.


Here is a wagon used to represent the ammunition wagon.


I was at my favorite hobby store and purchased some rubber pre painted horse and cattle that scale up perfectly with 15mm. I glued them to pennies and flocked them. They are adorning one of the fields in my upcoming battle.


I am heading back to the game now. Starting turn 3 with casualties mounting the Confederate batteries forming up to support the main attack.... stay tuned for the newsL

Wednesday 16 November 2016

Stones River 1862

I am ready to give my ACW rules another trial run. My favorite part about gaming this period is the opportunity to put together a really nice looking table with lots of interesting terrain. Many of the scenarios I have for Regimental Fire and Fury require a 5' wide table but my game table was only 4'x8'. Necessity and obsession are the mothers of invention. I bought a 1' wide board and bolted it onto the side of my existing table, held in place with 2x2s. Then I discovered the table was a bit wobbly so I remounted the legs so they were centred to the new table width. Now I have a 5x8 table and more options for scenarios especially for Fire and Fury and Napoleons Battles which usually call for 9x5 tables.

I selected a scenario from the main RF&F rulebook called " The Battle Comes to Sheridan: Stones River". I cut the hills out of my 1" thick foam and placed them under the game mat. I had enough fences and trees but needed to cut up some teddy bear fur and floormats to make the various crops. I bought a little hand vacuum which allowed me to use my home made flock liberally, as I knew it would be easy to clean. Here are some pictures of the battlefield without troops.


The troops have been sorted, labeled and marched onto the table. I added some flock to one of the fields and painted up a second ammunition wagon.


Saturday 12 November 2016

Skirmish in Italy

I have always wanted to play some battles in the Italian campaign for WW2. Challenging terrain, cool scenario ideas, Canadian troop presence and not a big focus on tanks. I had fun putting together a couple of Italian style buildings. They were a fun to do and I stole the design from photos found on another blog. These building had a drywall mud layer added to the walls which I textured using a sponge before the plaster dried. The roof was made out of corrugated cardboard sheets found at my local craft store in the scrapbooking section. Both houses have a removable roof and the large house has a removable second floor.

Casa #1


Casa #2


I also bought some nice Birch trees from the same craft store for 50% off. I added a washer to the base for stability and voila.
A stand of Birch trees

I decided to put my game cloth over the hills and built some hills from soft foam with lots of altitude to accommodate the larger 28mm scale of my planned game.

Hills ready for battle

Now to set the table for battle. I have been preparing my troops and terrain for several weeks to give Bolt Action a try. In keeping with the Italian theme, I set the table to resemble a small village set in the Italian hills. Bolt Action is a game that lends itself well to a narrative style of play. This scenario had a defecting high ranking Italian officer trying to meet with Allied troops to give sensitive information over. The local German garrison got wind of the meeting and dispatched troops to capture the defector.

Table set up

The American contingent consisted of the following troops:

1st Lieutenant + NCO

5x10 man squads of regular infantry with 1 SMG and 1 BAR


The German contingent consisted of the following troops:

1st Lieutenant + NCO

2x 10 man squads of regular infantry with 2 SMGs, 1 LMG and loader, 2 Panzerfausts

2x10 man squads of veteran Fallschirmjager  with 2 SMGs, 1 LMG and loader, 2 Panzerfausts

1 sniper team

1 medium mortar team with spotter

1 MMG team

2 armored half tracks

I had help with photography for this battle from my opponent Martin.

The first turn saw both forces march onto the table. The American half track gunned down an infantry unit in the open with it's HMG  causing a casualty and a pin. The Americans tried to keep in cover of the hill while the Germans occupied the large building. The lone figure in front off the house is the defecting officer.


The Americans decided to let the Germans try to snatch the defector and then counter attack them while they were exposed. A unit of Fallschirmjager  dismounted from their half track and successfully grabbed the defector, shooting up an American infantry squad for good measure. The Americans behind the hill advanced and shot up the Fallschirmjager , reducing it to 4 models. A third American squad assaulted the remnants of the Fallschirmjager  unit but were wiped out in the attempt. 

German regulars occupy a house

Fallschirmjager  survive the counterattack and and head for home


German regulars in support + sniper team

2nd Fallschirmjager unit cover the retreat
Fallschirmjager survivors
 Half tracks exchange fire

American view down Main St


 Americans kill a half track in assault


The remaining Fallschirmjager  headed for friendly lines with their captive. The Americans tried to pursue but were repulsed by German units waiting in ambush covering the retreat. The American sniper had some success in forcing the German unit in the big casa to keep it's head down and away from open windows. The American mortar manage to drop a shell into this same building, killing the German commander and mortar spotter.  The German MMG managed to take out the American HMG.

Bolt Action played well although we spent a bit of time flipping through the rulebook as neither of us had played the rules, We both enjoyed the 28mm scale and thought it looked great. The random unit activation allowed for some strategy and decision making. The rules for shooting, movement are straight forward especially around infantry, Building combat, indirect fire and vehicle rules required the most time with my nose in the rulebook.

Thanks for a fun game Martin!

Next up will either be Napoleonics with the group and or a solo game of ACW.